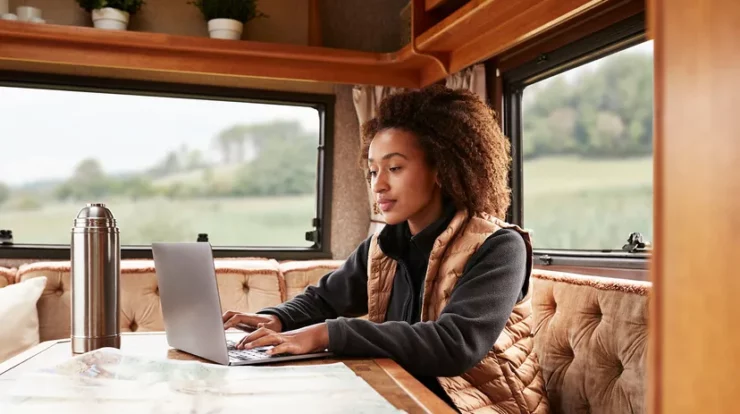
One of the most creative and easy ways to decorate pottery is with underglaze painting. It lets potters and ceramic artists put bright, detailed patterns right on clay surfaces. After firing, the designs are protected with a clear glaze. Underglaze paints, unlike overglazes or standard glazes, do not move or run during firing, making them ideal for fine line work, drawings, designs, and multicolored layering. This book is designed for beginners who want to learn the basics of underglaze painting, from choosing the right materials to learning the most important techniques.
What Is Underglaze Painting?
Whether clay is leather-hard, bone-dry, or bisque-fired, underglaze painting entails applying specially made ceramic colors straight onto the clay. The colorants in these pigments are usually water-based and don’t have the fluxes and glass-formers that are in glazes. This means that they stay in place when the pottery is fired. Underglaze images become vivid, permanent, and food-safe once they are topped with a clear glaze and fired. The consistency and longevity of this method make it popular in practical pottery, tile design, and illustrative clay art.
Essential Tools and Materials
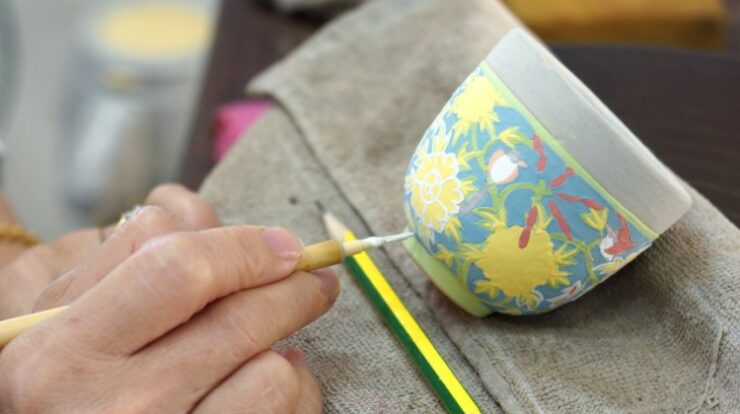
To start underglaze painting, you’ll need various good underglaze colors. For beginners, we suggest names like AMACO Velvet, Mayco, or Spectrum. You’ll also need different kinds of brushes, like round, flat, and detail brushes made of natural or synthetic hair. You will need a smooth pottery surface (like bisqueware or leather-hard clay), a palette or tile to mix colors on, and clean water to clean your brushes. Using test tiles will also help you see how the colors appear after firing. Fine-tip applicators, sponges, pencils for drawing designs, and cutting tools for sgraffito work are some of the extra tools that can be used.
Preparing Your Surface
For underglaze to stick well, the surface must be thoroughly prepared. For techniques like sgraffito, you can paint straight on leather-hard clay. If you want more control when painting with a brush, choose bisque-fired pottery. Make sure the surface is clean and smooth, as dust or other things could get in the way of an even application. If you are painting on greenware, don’t handle it too much afterward to avoid smudging or making marks by mistake. For bisque, use a wet brush to lightly wipe the surface to get rid of any dust that could stop the underglaze from sticking. Results and color consistency will improve if the surface is clean and absorbent.
Basic Painting Techniques for Beginners
To gain confidence and control, begin with easy patterns like lines, dots, shades, and flower designs. To intensify the color, underglaze may be applied in one or more layers. To prevent lifting or fading, always let one coat dry before applying the next. When painting details, use small brushes. When painting washes or backgrounds, use bigger brushes. You can also mix underglazes with water to make effects that look like painting, or you can add tones that go well together to make delicate shading. There is a useful way to see how different colors and techniques work after firing when you practice on test tiles.
Layering and Mixing Colors
To give your art depth and dimension, underglazes can be layered. Layering a lighter color over a darker one, for instance, can change the base hue and lessen the effect. To prevent the colors from becoming muddy, it’s crucial to wait for each layer to dry before applying the next. You can also make your own colors by mixing underglazes on a palette. Please ensure that the base colors are from the same brand. For realistic images like scenery, animals, or portraits, where tonal variation increases reality, layering and color blending are ideal.
Adding Detail and Texture
Consider applying sgraffito techniques, which involve applying glaze under clay and then carving into it to show the clay underneath. This method works best on clay that is as hard as leather. You can also use fine brushes or slip-trailing tools to add thin lines or borders for style. If you want to soften the background or mix the lines, you can use a sponge. Ideal for line art or technical drawings, underglaze pencils and pens are also available for sketch-like effects. The detail you get depends on your brush control, paint thickness, and surface absorption.
Drying and Glazing
Allow the piece to completely dry after painting, especially if the underglaze was applied to greenware. After the design is dry, cover it with a clear glaze to keep it safe. Most people choose clear gloss glazes, but smooth or matte clear glazes can also be used, based on the look they want. Carefully dip, brush, or spray the clear glaze on clay pieces when glazing them so as not to mess up the design that was underglazed. As some glazes slightly change or enhance tones, always test how the glaze affects color. Let it dry completely before firing so the glaze doesn’t bubble or crawl.
Firing Tips
In electric kilns at Cone 05 (low-fire) to Cone 6, the majority of commercial underglazes are intended to perform well in oxidation atmospheres. Always look at the sticker to see what temperatures are suggested. Some things about the clay and the firing process can change the final color, so it’s a good idea to fire some sample tiles first. There are also high-fire underglazes, but they are more likely to flow and change color. When you use a layered or mixed application, you should know how the type of kiln (electric, gas, or wood) and the firing speed can change the result.
Practice Ideas for Beginners
To get better, start with easy projects like painting test tiles, coasters, or mugs with simple designs. Learn techniques like gradient blending, outlining with fine brushes, and layering two or three colors. To get better at accuracy and brush control, try making the same design more than once. As you get better, add more difficult techniques like sgraffito or mixed media work. You can keep track of your progress and get the same excellent results in future projects by keeping a sketchbook or log of your tests with notes on colors, glaze types, and firing conditions.
Common Mistakes and How to Avoid Them
Applying underglaze too thickly is one of the most common mistakes, which can lead to cracking or color confusion. Another problem is working the surface too hard while it’s still wet, which can make the appearance dirty or uneven. If you use the wrong brush size, it can also be harder to make straight lines or fill in areas without any bumps. Before applying your design to a final piece, you should always test it on a tile. Rushing into glazing before the underglaze has dried can also lead to smearing or peeling. Finding the right balance between patience and consistency is important for learning this art form.
A fun and interesting way to make your ceramics come to life is through underglaze painting. To find your own artistic style, you should learn about the materials, practice basic techniques, and play around with color and texture. Becoming good at underglaze painting is an important skill to have if you want to make useful pots, pretty pieces, or complex ceramic art. Even beginners can get beautiful, long-lasting results with time, patience, and a desire to experiment.