
Import your locally stored files to Kodi is done through media sources. These are the files on your device or an external device containing music, videos, and photos. Therefore, if you are wondering how to add media sources to Kodi, meaning that you want to know how to create your own (locally stored) library, and that is precisely what I will teach you.
The mere requirement you need to meet is to have media files on your device. I will soon tell you how to organize those files to add new media sources to Kodi as efficiently as possible.
Let’s dive into this process.
How to Add Media Sources to Kodi
Here is how to add media sources to Kodi.
Step 1: Organize Your Locally Stored Files!
Before we proceed, it’s essential to understand the basics of this process. In other words, it is crucial to know how Kodi sees your music, videos, and photos.
We will be talking about adding media sources to Kodi. We will connect various folders that contain your media files. Thus, it is crucial to organize your folders to have only a single type of media (either photo, videos, or music) in one folder.
For instance, create a folder with your movies, a folder with your photos, and a folder containing any music you would like to add to Kodi.
You are also free to create sub-folders to help Kodi further. For instance, you can create sub-folders of specific genres or categorizing your movies before they get imported to Kodi.
Step 2: Add Media Sources to Kodi
We require to instruct Kodi where to look for media files. Here is how to ‘connect’ your media sources to Kodi.
1. Firstly, launch Kodi and select ‘Videos‘ from the main menu.
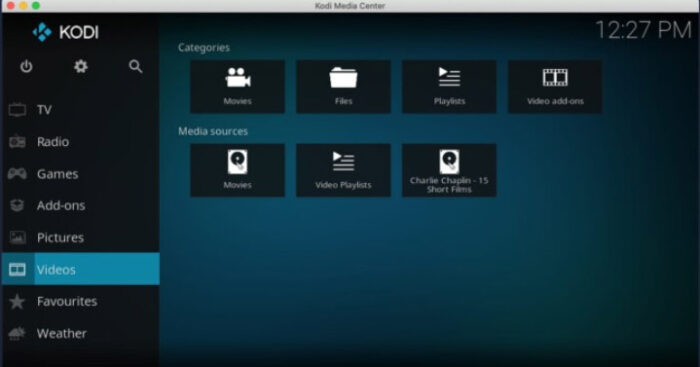
2. Take a glance at the upper side of the screen and tap on ‘Files.’
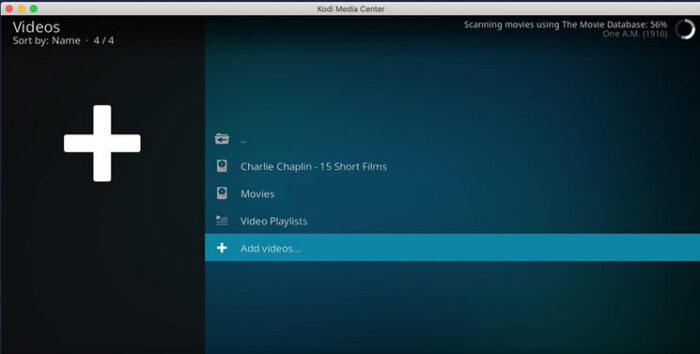
3. Next, you need to tap on ‘Add Videos,’ and a pop-up window will appear.
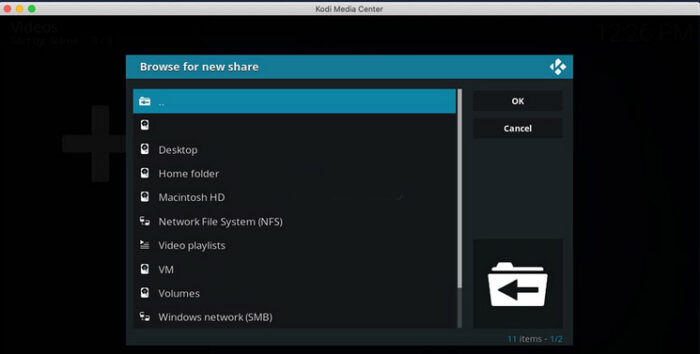
4. Tap on ‘Browse’ (on the right side) and navigate to your locally stored media source. When done, tap on ‘OK‘ to confirm the file path.
5. Now, you need to name your new source. Go with any name (something you will quickly recognize later on), and hit ‘OK‘ to dismiss the pop-up.
Step 3: Set a Suitable ‘Content-Type’
So far, you have connected your media source with Kodi. Although, we now need to tell Kodi what sorts of files you are adding so that Kodi can categorize those files correctly.
1. At this moment, you’ll see the ‘Set Content’ pop-up on your screen. If you do not see it, right-click on the newly added source & pick ‘Set Content.’
2. Select the ‘This Directory Contains’ field, and you will get to pick from various categories. Based on what you are trying to add, pick either ‘movies,’ ‘TV shows,’ or ‘music videos.’
3. Based on your selection (music videos, movies, or TV shows), this is where Kodi will display one of three possible branches of settings. As I want to make this guide as helpful as possible, keep on reading based on what you have selected at this point.
If You have Selected ‘Movie.’
We have two main groups of settings here. You have to select an information provider (and adjust additional settings); after that, you can choose content scanning options.
So, by default, ‘The Movie Database‘ will be selected as the information provider. We have using TMDb for a long time, and it never managed to disappoint it. Although, other options are available, and you can preview those by tapping on this field.
Go to the ‘Content Scanning Options’ group; you can adjust some things. If you enable the first option (meaning that movies are in separate folders), Kodi will use the folder name to scrape the movie.
You can even enable the ‘Scan Recursively‘ option if you have plenty of files with many sub-folders. It is handy when you’ve sub-folders for particular genres or movie sets.
The last option (‘Exclude path from library updates‘) is helpful if you’ve large libraries, but you do not plan on adding content to them in the future.
If You have Selected ‘TV Shows.’
Similar to the previously described content category, you will see two groups of settings. So, here is what you need to know about those.
Firstly, select a data provider. By default, ‘The Movie Database’ is enabled; I recommend you stick to this option, as it is a highly reliable one.
Then, if you’ve only one TV show in a single folder, you can enable the ‘Selected folder contains an available TV show‘ option. It is helpful if you want to change the content settings without affecting the whole source.
At last, the ‘Exclude Path from Library Updates‘ option must be selected only if you have a vast library to scan. But, no new content should be added to it.
If You have Selected ‘Music Videos’
When you pick an information provider, you will get to fine-tune your music collected by adjusting the following settings.
By default settings, Kodi will try to use locally stored files’ metadata. If you would like to expand on that info, you can pick a different information provider. To do this, tap on ‘Local Information Only,’ then tap on ‘Get More‘ and select ‘TheAudioDB.com.’
And when it comes to other options, you can use folder names for lookups. It is handy if you have a library with nicely organized sub-folders based on different artists or genres.
If you allow the ‘Scan Recursively‘ option, Kodi will dive deep into the media source structure. Best used for a massive library with numerous music files.
Finally, the ‘Exclude Path from Library Updates‘ option enables you to import an enormous library quickly. But, no more updates will be applied to the future.
Step 4: Add Files to Your Kodi Library
Finally, we are required to confirm all the settings we have tweaked. This step will force Kodi to begin indexing the newly added media source.
1. When you fine-tune everything in the ‘Set Content‘ pop-up, tap on ‘OK.’
2. The pop-up will close now, and a new one will open, asking to refresh your source.
3. You can tap on ‘OK,’ and Kodi will now begin to import your media files. And, based on the size of your library, this probably takes some time.
Final Words
Dear Readers, that would be all on how to add media sources to Kodi. If you’ve any questions, make sure to post your comments in the below section. And of course, don’t forget to share this article online. Thanks, and enjoy using your new Kodi library.


