Updating Windows 11 is important since it lets you receive the most recent security features and freshly built system files. However, when upgrading to Windows 11, your PC or laptop may face an error. If the updates are not properly installed, you may see an error message stating, “We weren’t able to finish the updates, Windows 11 undoing changes made to your computer.” You can’t do anything on your computer while it’s waiting for the update. Sit and wait. It takes 30 minutes to an hour to undo any changes made to the computer when updating it. You’ll need a solution to this issue if you’ve a strong desire to do something and cannot sit still for lengthy periods.
How To Fix Quickly Undoing Changes To Your Computer In Windows 11?
Because it provides security, patches, vulnerability fixes, and other benefits, so updating the most recent Windows system updates is crucial. However, occasionally during the updating procedure, our PC becomes stuck on the restart screen with the message. As a result, we could not finish the updates by reversing changes. We have the ways listed below to address this issue.
Boot Into Safe Mode
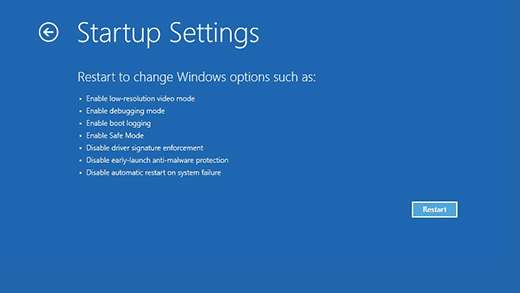
- First, you must enter Windows 11 safe mode by pressing the power button while resuming. Then, you must repeat the process until your PC displays an Automatic Repair screen.
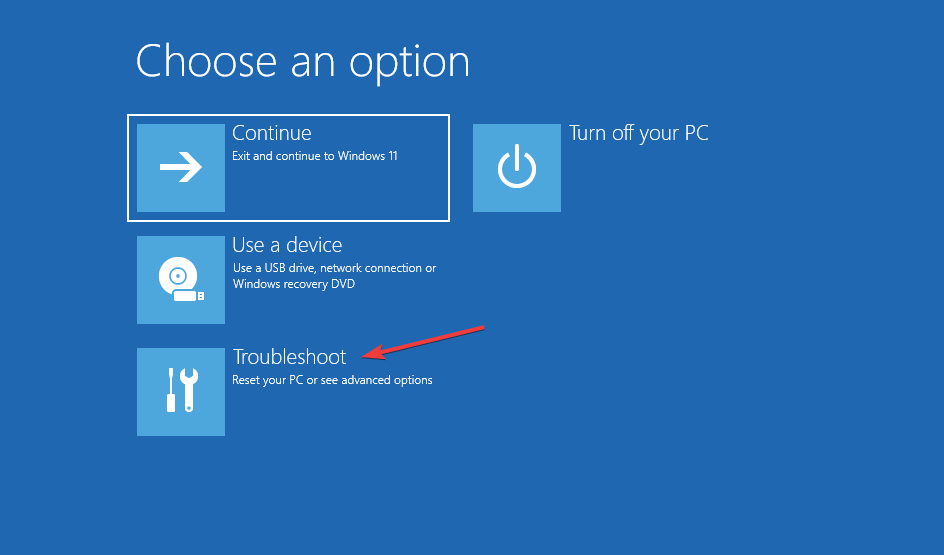
- Click Troubleshoot in the Advanced Options.
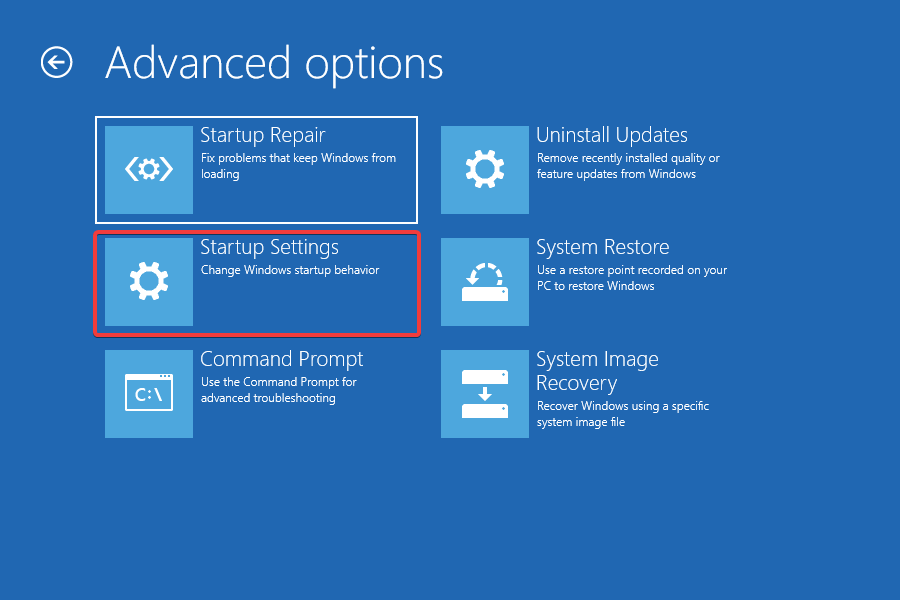
- Then select Advanced Options > Startup Settings.

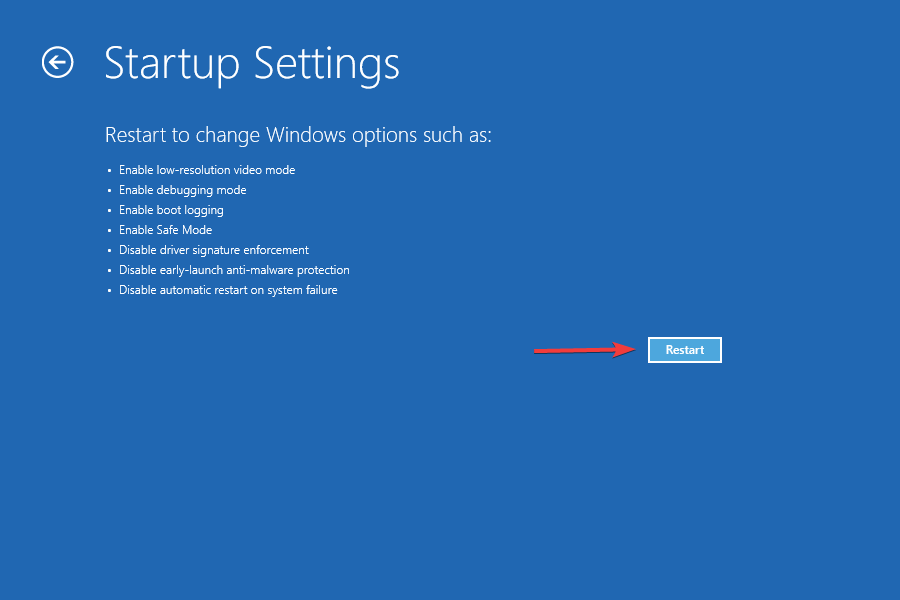
- To access the startup menu options, click the Restart button.
- Select the seventh option to boot your PC into safe mode by hitting 7 or F7.
Run Windows Update Troubleshooter
- Click the search bar at the bottom of the Windows screen, type troubleshoot settings, and click Open.
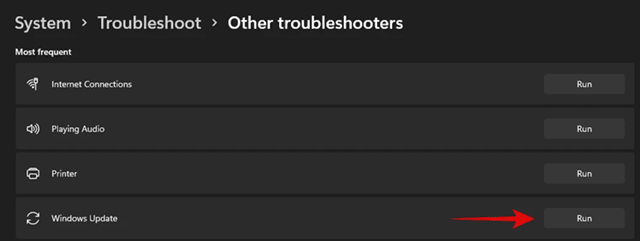
- Now you’ll see the troubleshooting screen, where you’ll need to click Other troubleshooters.

- Following that, you’ll see a list of options in Other Troubleshooters. Next, you need to find Windows Update and click the Run button next to it.
- The troubleshooting results will appear on your screen after some time, so wait.
Uninstall Recent Windows Updates
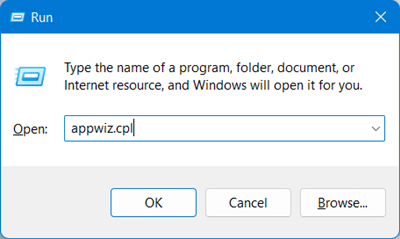
- To open Programs and Features, press the Windows + R button, type appwiz.cpl, and press Enter.
- Locate and click View installed updates after accessing the Programs and Features windows.
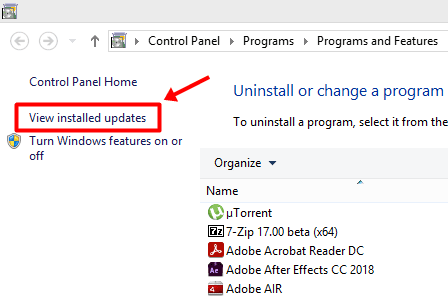
- The following screen displays all of the recently installed updates. You need to select that update and then click the Uninstall button.
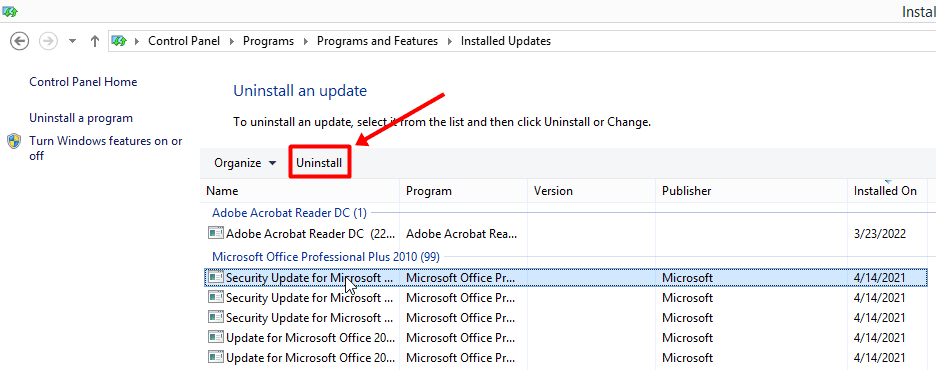
- Once removed, restart your computer to make the necessary adjustments.
Run An SFC & DISM Scan
- Select Windows Terminal (admin) from the list of options by pressing Windows + X.
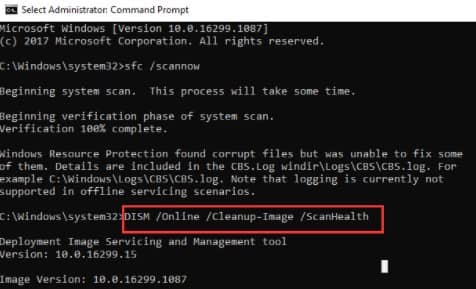
- Then, to scan your important system files, use the following command: scannow /sfc
- Then, it would be best to run the DISM (Deployment Image Servicing and Management) scan to download system files directly from the Microsoft server.
- You must open the Windows terminal with administrative access once more and run the commands listed below one by one.
DISM /Online /Cleanup-Image /CheckHealth

DISM /Online /Cleanup-Image /ScanHealth

DISM /Online /Cleanup-Image /RestoreHealth
Use System Restore
- Creating a restore point may be found using the Windows search button at the bottom of the Windows 11 dock. It should be open.
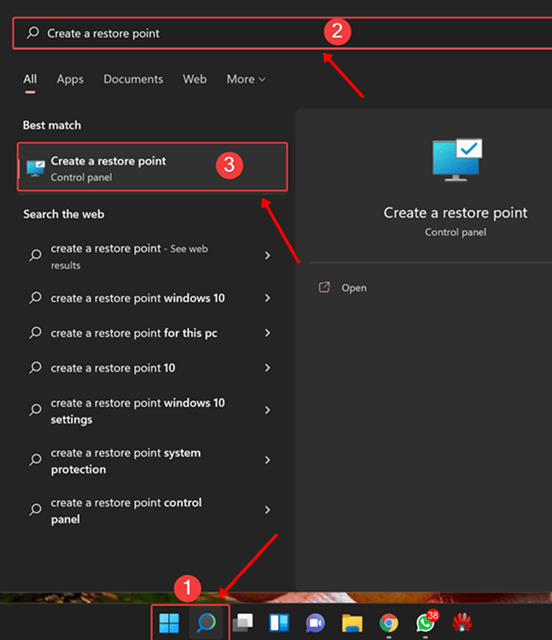
- You must go to the System Protection tab and click System Restore now that you’re in the System Properties window.
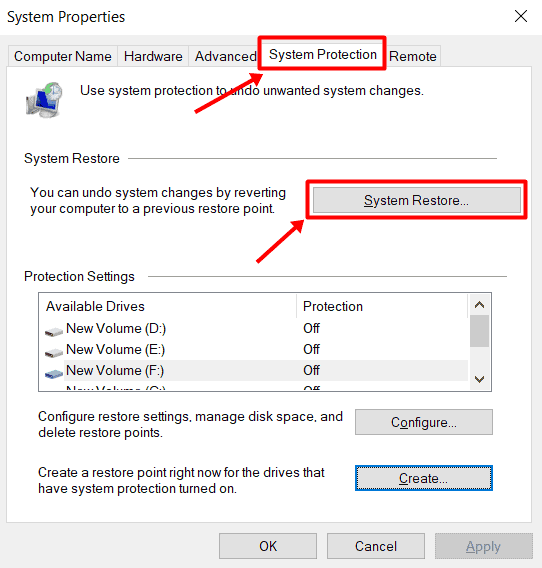
- You may now select a suggested system restore point based on your needs. In addition, the date and time of such repair are visible.
- Now, click the Next button and follow the on-screen directions to return your windows to their original state.
Conclusion:
It’s all over for now. You can remove the Windows 11 undoing changes made to your computer system error message by using any of our solutions. Additionally, programs for optimizing your system and cleaning it up are advised to assist in cleaning the PC and removing trash files.
