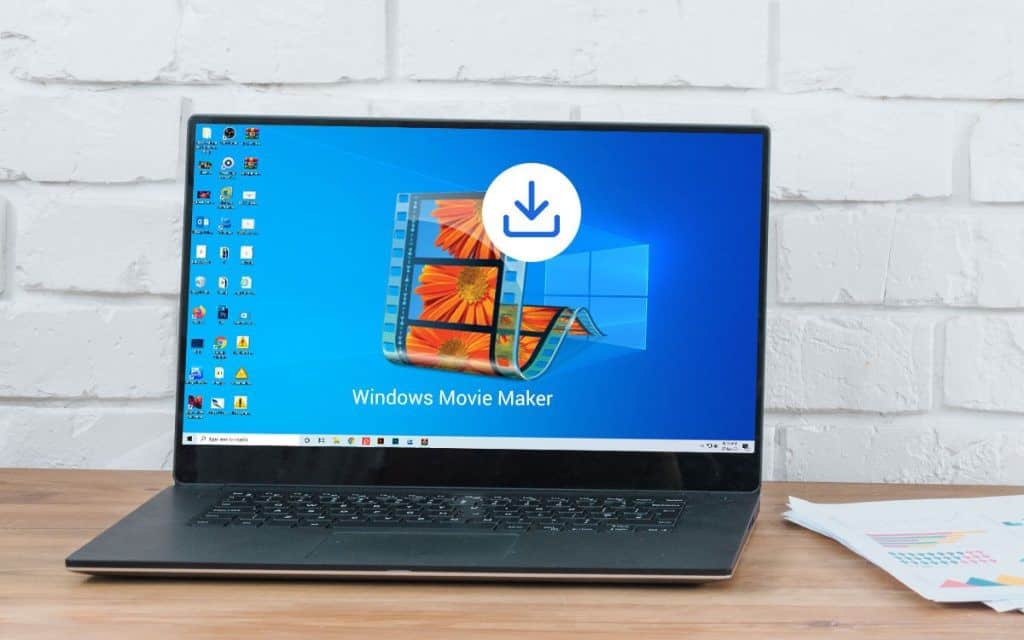
Windows Movie Maker is the most incredible pieces of software the company ever created. Unhappily, it was discontinued for some crazy reason by Microsoft. But, you can still efficiently legally download it for free and use it as much as you wish.
This software was first released with the horrific iteration of Windows known as ME way back in 2000. This was the star of that operating system. We could create and edit videos with ease! While the program was updated through the years, many more powerful tools were added in. That still blows my mind that it has not been continued, but I digress.
The software lets you capture the video from your camera – or any device. You can import it in any of the many supported formats. Unluckily, not all designs will work. For those, you would need to install additional codecs here.
How to Download and Install Windows Movie Maker
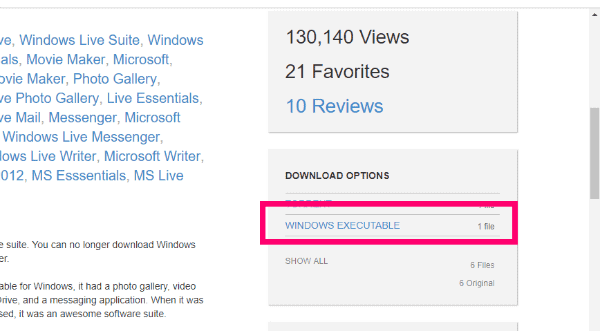
This first thing you will need to do is download Windows Live using the ”Windows Executable” link on the right side in the middle of the screen.
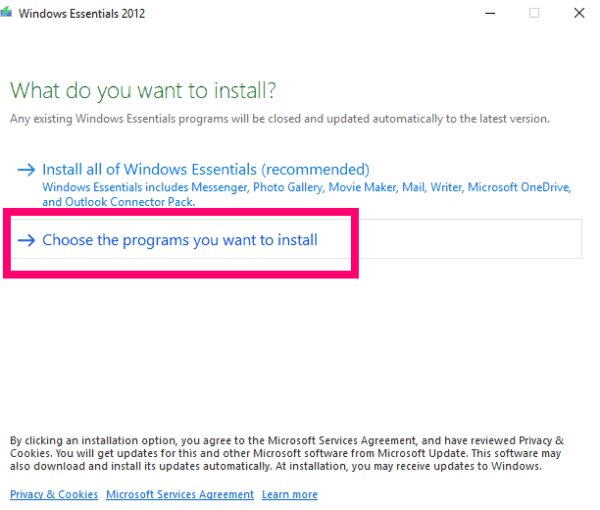
Start the setup by double-clicking the executable wherever you saved it. When the new window pops up, asking you ”What Do You Want to Install?” be sure to click ”Choose the Programs You Want to Install.”
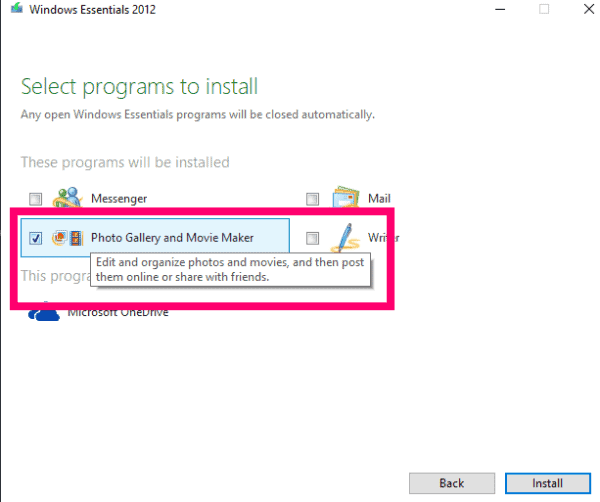
So, Uncheck everything except ”Photo Gallery and Movie Maker” and then click the ”Install” button.
Well, As soon as it has finished installing, click ”Movie Maker” in your Start Menu and accept the Terms of Use and License Agreement.
How to Use Windows Movie Maker
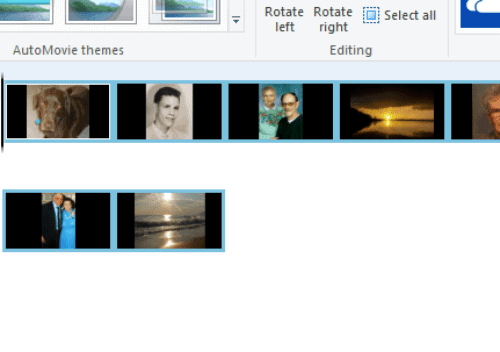
This first step is to click the ”Add Photos and Videos” button at the top to open up your Pictures folder.
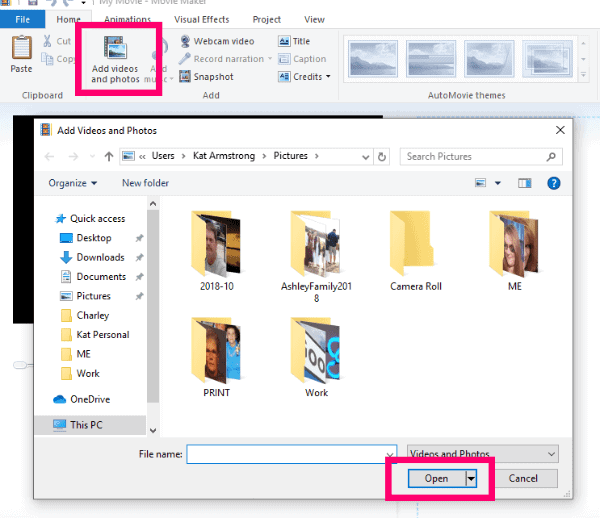
Then, select the photos (or videos) you would like to add to your Movie. So, Once they have populated the area, click once on an image and drag then drop into whatever order you prefer.
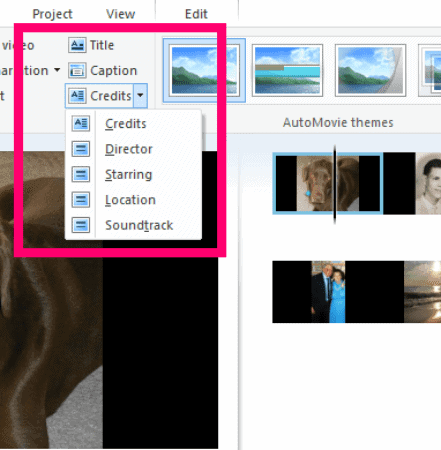
This next step I would take is to add any Titles, Captions and Credits to my current version. Clicking ”Title” lets you place a title slide just before the selected photo. Picking ”Captions” will help you overlay text (using your fonts, colours, sizing and so on) onto the current image. Also, last – but not least – ”Credits” helps you to credit a director, soundtrack, actor and more.
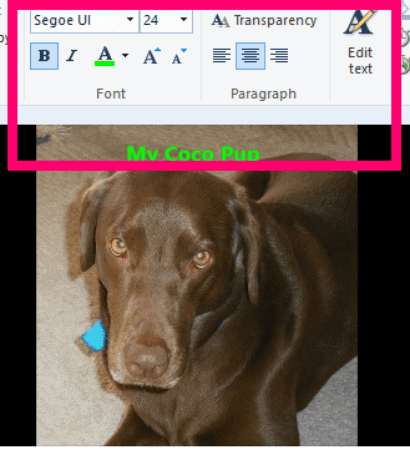
As well, Once you have added some text onto the photo, you will see several new little boxes pop up to the left. Those allow you to change the way the reader will display: fading, stretching, and scrolling are a few options.
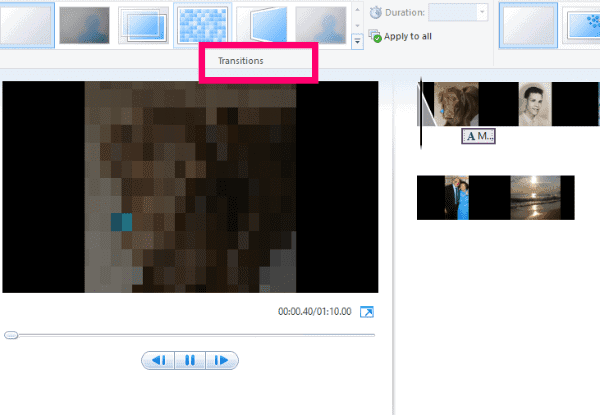
That next thing you can do is to click on the ”Animations” tab. Hither, you will be able to choose how you wish your photos to transition and appear, from crossfading to pixelating and even a more cinematic appearance. Even you can decide to apply the same change to all images or use a different one on each separate one.
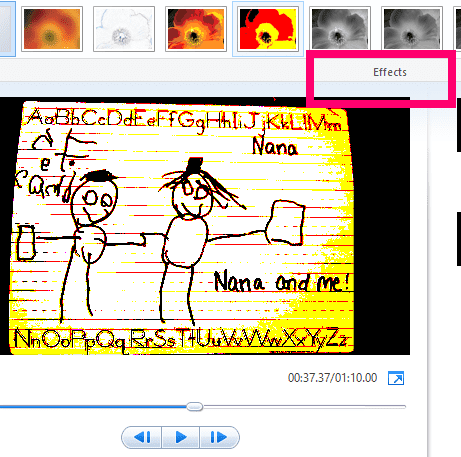
Then, let’s look at the ”Visual Effects” tab. With this, think filters. Several will add a different look to your pics. Repeat, you can add the same one to all or different to each.
Next, let’s head back to the ”Home” tab. This is time to add some voiceover or music to your video!
How to Add Voice or Video to Your Movie
Here is where things can get a bit tricky. This ”Record Narration” button does exactly as it says: it lets you tell your story in your own words and voice. Attaching music is where you need to be careful. You cannot utilise copyrighted music! Clicking the ”Add Music” button will give you a drop-down box of several places online to look for free-to-use music.
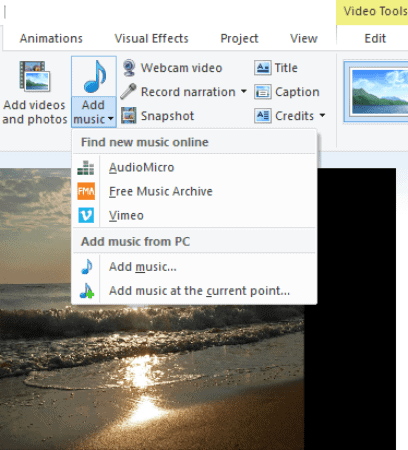
And, You can obviously create your music. Write & record and upload to your heart’s content!
What to Do with Your Movie
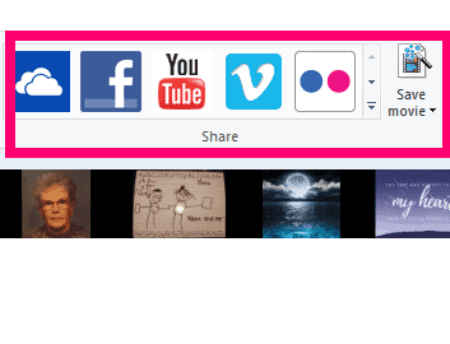
Here, Once you have finished adding all of the effects, photos, music and more and are satisfied with the outcome, I highly recommend first saving it to your computer. Following that, you can either use one of the built-in ”Sharing” buttons within Windows Movie Maker or upload it to your favourite website directly from your machine.
So, I have only touched on the very basics of what Windows Movie Maker can do. Suppose I were to go into every option built into the software, we could be here all day. Instead, you can use SO many different things for a presentation for work, a slideshow for a party or reception, school projects, and even those beautiful lyrics videos on YouTube. Over, though: be careful of copyrighted music.
Also, Check :
Final Thought :
What additional Windows software or Movie Maker questions do you have? Well, Are you stuck somewhere in creating your Movie? Allow me to know in the comments, and I will do my best to help!