Live videos are becoming more popular, not only among large broadcasting networks but also among small enterprises. Live video has become popular, and it may be a helpful tool for digital marketers, influencers, and companies. Facebook Live is much like any other Facebook Live video streaming function. You may use your profile or corporate page to stream a live video to your followers. Facebook Live Stream was released in the April of 2016 and seemed pretty helpful. Once the live broadcast has ended, businesses may utilize this function to manage their audience. If you’re having trouble driving prospective clients to your website using Facebook Live Stream, check out our How To Do Facebook Live Stream- Ultimate Guide!
1. Follow up on Facebook News
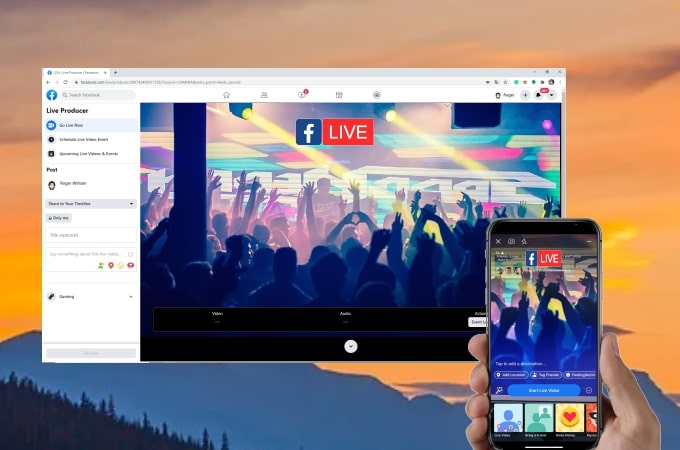
Log in to your Facebook account if you wish to perform a Facebook Live Stream. If you have a company page, you may go live from there, or from your normal Facebook profile. You’ll see the Facebook status bar on your timeline, where you’ll find the Live Video option. It’s shown by the camcorder symbol.
When you choose Live, Facebook will request access to your camera and microphone. You will not be allowed to participate in the Live Stream if you decline it. This is a no-brainer. You want everyone to see and hear you if you’re going live. These prompts will not appear until the live video has been accepted.
2. Go for a Video Description
Facebook Live is all about video, as we’re all acquainted with. But it isn’t totally accurate. If you’re making a video, your only goal will be to get it viewable to as many people as possible. As a result, you’ll need to write an intriguing description that will entice users to watch your Live video.
Whatever description you provide will appear just above the video on Facebook viewers’ timelines. As a consequence, continue to write a captivating description to capture your interest. Make sure your report adds value to your video and provides enough information to pique people’s interest.
You have the ability to add your location, tag individuals, and use emoticons when creating a description for your live video. These capabilities are useful if you’re publishing from a certain location, want to highlight an employee, or just want to have some fun.
3. Select Privacy Setting, If Posting from Personal Account
If you want to use your Facebook business page to post, be aware that your Facebook Live Stream will become public by default. This is the option you’ll choose just if you need to garner public support and communicate with them.
However, utilising Facebook’s audience limits, you will be able to permanently limit the audience by location. When you publish from your account, you’ll have the chance to customise your settings. You may, for example, specify who can see your live feed. To set your privacy setting, all you have to do is follow a few simple steps.
If you want our advice, keep the broadcast open to the public so that your live stream may reach a larger audience throughout the globe. And if you want to enhance the amount of people watching your live stream, buying Facebook live stream views from social media marketing firms will make it much simpler. It will assist you in seeming popular and attracting more people.
4. Add a Facebook Live Filter, Lens, or Doodle
Facebook provides a variety of lens filters, as well as the ability to write or draw on your live-streaming recordings. So that you don’t miss it, you’ll be able to choose through many alternatives directly below the “Start Live Video” button.
While employing them might be entertaining and whimsical, be sure you don’t use a filter that detracts from the subject of your movie. If you’re thinking about using a filter, Doodle, or lens, make sure it matches the video’s range and isn’t distracting.
For example, you must choose a filter that will apply a colour overlay to your whole screen. Then it’s possible that it’ll annoy your audience. Filters may be used as frames once again. It may seem cluttered, but it will be useful for framing your topic and overshadowing the screen.
5. Press the “Start Live Video” Button
Now that you’ve chosen your filters, make sure you’re facing the camera appropriately. To begin your Facebook Live Stream, make sure the item or topic is in position and click the blue “Start Live Video” button.
And once that’s done, you’re living! Your live video will be visible to all of your viewers and will display in your feed. You may stream for up to 90 minutes, but bear in mind that the longer you remain, the higher your chances of engaging with the content.
6. Call Out Commenters by Name
Yes! This may seem juvenile, but addressing commentators by their first names can help you establish a stronger relationship. You may immediately call out the name and respond precisely when answering inquiries on your live feed. It will make them feel unique and strengthen their friendship.
Final Words:
If you follow this How To Do Facebook Live Stream – Step Guide, you will be able to create a decent Facebook live video. You should perform a live video to attract more people by making it appear more genuine and engaging. Also, make sure that your viewers receive the right information and learn from your live broadcast.


