
However, we are in such a situation, cooped up in our houses, where the internet has become necessary in our everyday life. Furthermore, at some point in our lives, we all encounter a situation where we cannot connect to the internet world due to a cached DNS cache. So, if you’re wondering how to flush the DNS cache or settings on your Windows 11 PC, this is the first time you’ve heard of this word. But, if this is the case, you’ve come to the correct place. This essay will examine what DNS cache is and what flushing DNS cache accomplishes. Furthermore, we share several fantastic methods for simply flushing the DNS cache on your Windows 11 system. So, let’s have a look at them.
What Is DNS?
The DNS is an index that connects all domain names on the internet to their corresponding IP address, similar to how a phone book connects persons to phone numbers. DNS cache flushing is difficult, but it takes little to no technical knowledge. Clearing your DNS cache might be beneficial in various scenarios to resolve a connection issue on your device. However, only a few users are accustomed to this. So, if you’re one of them, check out the methods outlined below. But before that, let’s learn a little more about DNS.
Why Is DNS Flushing Important?
There is no risk in using DNS because it does not keep any information, but it does have all of the information from the previous websites you visited. So, if someone accessed your DNS cache, which isn’t a difficult operation, your privacy may be jeopardized. This may also serve as an invitation to hackers. As a result, it is critical to Flush DNS frequently to guarantee your privacy and security.
Complete Guide On How To Flush DNS Cache In Windows 11?
There are several methods for flushing DNS on your Windows 11 PC. However, we have highlighted the most basic methods that anyone with no technical understanding may use. So, let’s go check them out.
Use Run Prompt
To flush the DNS on your system, use the Windows 11 Run prompt box. So, here are the steps to putting it to use.
1 – Launch the Run Prompt by pressing the Win+R keys simultaneously.
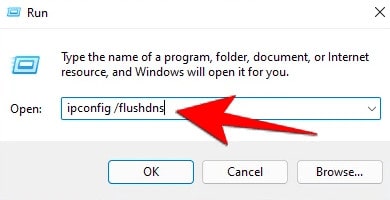
2 – Next, use the box to enter the following command.
ipconfig /flushdns
3 – That’s all there is to it. The DNS cache on your device will now be flushed.
Use Windows 11 Command Prompt
CMD is the second Windows 11 utility you may use to flush the DNS on your system. So, let’s check it out.
1 – Launch the command prompt with administrative privileges.
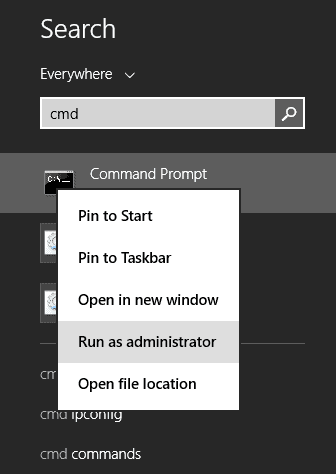
2 – Execute the next command after that.
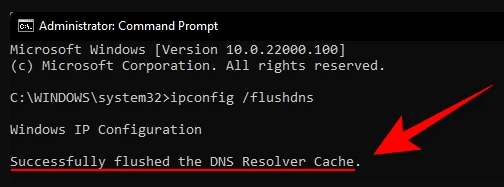
ipconfig /flushdns
3 – Once you have completed the preceding steps, you’ll receive a confirmation message stating that you successfully flushed the DNS resolver cache.
Use Windows PowerShell
This is our last recommendation. So, if you need more confidence that the two methods above worked for you, you must flush the DNS using PowerShell. So, let’s see how it goes.
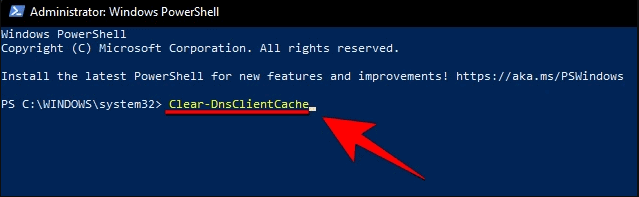
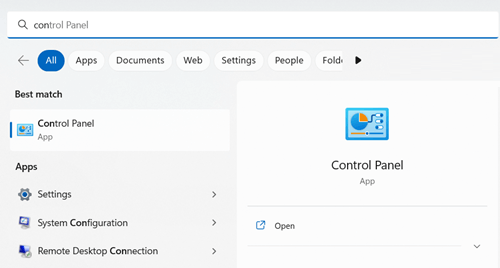
1 – Open PowerShell with administrative privileges after searching for it in your Windows search bar.
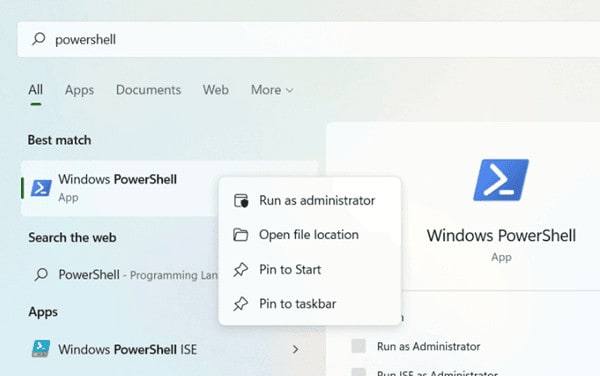
2 – Next, execute the command.
Clear-DnsClientCache
3 – That’s all there is to it. When you receive confirmation that the DNS cache data has been flushed, you have successfully flushed DNS.
Is There Any Way To Check The Current DNS Cache?
Of course, there is a method for checking the current DNS cache on your Windows 11 PC. So, let’s check out those steps.
1 – Launch the Command Prompt with administrative privileges.
2 – Execute the next command after that.
ipconfig /displaydns
3 – This command will now display the current DNS cache data.
Conclusion:
That’s all there is to it for now: how to flush the DNS cache on a Windows 11 PC. We hope the methods given above were beneficial to you. However, do use our comment area to let us know if you have any ideas for us.


