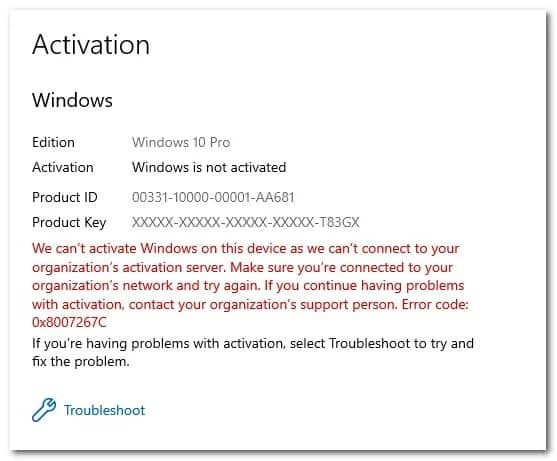
Many Windows 10 users have been encountering the 0x8007267C error code when activating a Windows 10 computer following the official channels. In the bulk of cases, affected users report that the key they’re trying to activate is perfectly valid.
After investigating this particular issue completely, it turns out that many different underlying causes might trigger this particular error code. Here’s a list of possible culprits that might be responsible for this particular error code:
= Common Activation inconsistency – According to some pretentious users, you can expect to encounter this issue in those cases where a common inconsistency hinders the activation that your Windows installation knows how to fix automatically. In this instance, all you require to do is to run the Activation troubleshooter and apply the recommended fix.
= Corrupted DNS Cache – Another reasonably common culprit that might cause this activation error 0x8007267C is an inconsistency caused by a corrupted DNS cache. In this example, you should resolve the problem by cleaning your current DNS cache from an elevated Command Prompt window.
= Bad DNS Range – Depending on ISP, you can further expect to see this error occurring in instances where your Internet Service Provider has allowed you a bad DNS range that the activation server rejects. In this case, you should be capable of circumventing the error by migrating your DNS to the equivalents given by Google.
= Different kind of activation is required – If you’re attempting to activate a key that originally migrated from Windows 7 or Windows 8.1, you might require to use the SLMGR utility to activate it successfully. If this situation is applicable, you should switch to a MAK activation attempt.
= An underlying problem with your license key – Under some special cases, you might need to get in contact with a Live Microsoft support agent and ask them to activate the license key remotely on your computer.
Now that you know every possible culprit that might be responsible for the apparition of this error code 0x8007267C, here’s a list of methods that other affected users actually confirmed:
Procedure 1: Running the Activation Troubleshooter
More frequently than not, you can attribute the apparition of this issue to some licensing inconsistency that is affecting your PC’s ability to communicate with the activation servers.
If you see yourself in this scenario, our recommendation is to start this troubleshooting guide by running the Activation Troubleshooter and applying the recommended fix. Most user statements flagging this issue have reported that the problem only started after a major hardware change (most usually replacing the motherboard).
If this situation is applicable in your particular scenario, follow the instructions below to operate the Activation Troubleshooter and apply the recommended fix:
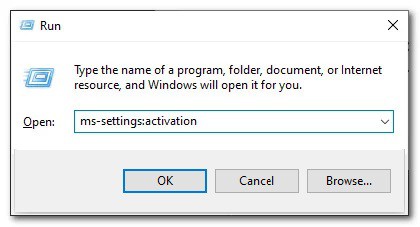
1- Open up a Run dialog box by pressing Windows key + R. Next, type “ms-settings: activation” and press Enter to open up the Settings menu’s Activation tab.
2- Once you’re inside the Settings app’s Activation tab, move over to the right-side pane and click on the Troubleshoot button under Activate Windows.
3- After you manage to launch the troubleshooter, wait until the initial scan is complete, then click on Apply this fix if a viable repair scenario is identified.
4- If the fix is successfully applied, reboot your PC and see if the problem is fixed once the next startup is completed by activating the license key once again.
If you still end up viewing the same 0x8007267C Error is still occurring, move down to the next potential fix below.
Procedure 2: Flushing your DNS Cache
Since this critical error code 0x8007267C can be translated to ‘No DNS servers configured for the local system.’, you should begin this troubleshooting guide by flushing your current DNS (Domain Name Server) to fix the majority of network inconsistencies that might be preventing your computer from connecting to the Activation server.
If this scenario is appropriate, you should be able to fix the problem by opening an elevated Command prompt and running a series of commands that will successfully flush and renew your current DNS configuration.
Note: Going this route will not generate any underlying changes in regards to how your network operates. The only thing that this does is ends up clearing the current DNS-related temp data and forcing new DNS info.
In case you have not tried fixing the 0x8007267C error by flushing your current DNS yet, follow the instructions below:
1- Press Windows key + R to open up a Run dialog box. Next, write ‘cmd’ inside the text box and press Ctrl + Shift + Enter to open up an elevated Command Prompt with raised access. When the User Account Control prompts you (UAC), agree Yes to grant admin access.
2- Once you’re inside the elevated Command Prompt, type the following command and press Enter to flush the current DNS cache:
ipconfig /flushdns
3- Wait until the operation is finished. It would be best if you got a confirmation op up informing you that the DNS has been successfully refreshed.
4- After you see the success message, type the following commands and press Enter to renew the current IP configuration:
ipconfig /renew
5- Once the second command is processed successfully, try to activate your Windows installation once again and notice if the issue is now fixed.
If flushing your DNS cache didn’t let you fix the issue, move down to the next potential fix below.
Procedure 3: Migrating to Google DNS
If a sample didn’t fix the activation error 0x8007267C in your case, that doesn’t mean the problem is not DNS-related.
It’s further possible that the MS activation server no longer accepts the current DNS range used by your ISP (Internet Service Provider). If you see yourself in this particular scenario, you should correct this problem by changing the default DNS range with the equivalents supplied by google.
To make matters simpler for you, we’ve walked you through the entire process. Follow the instructions below:
1- Press Windows key + R to start up a Run dialog box. When you are inside the Run prompt, type ‘ncpla.cpl’ and press Enter to start up the Network Connections menu. If you’re prompted through the User Account Control (UAC), agree Yes to grant admin access.
2- Once you’re inside the Network Connections window, right-click on Wi-Fi (Wireless Network Connections) and choose Properties from the context menu. If you’re utilizing the wired connections tab, right-click on Ethernet (Local Area Connection) instead.
Note: When prompted by the UAC prompt, agree Yes to grant admin access.
3- Once you’re inside the Ethernet or Wi-Fi menu (depending on your type of connection), click on the Networking tab and find the section that says This connection uses the following items.
4- After you manage to identify the correct connection, click on Internet Protocol Version 4 (TCP / IPv4), then click on the Properties button.
5- Inside the Internet Protocol Version 4 settings, go ahead and click on General, then enabling the box associated with Use the following DNS server address.
6- After you get to the next screen, replace the current values of Prefered DNS settings and Alternate DNS server with the following values:
- 8.8.8.8
- 8.8.4.4
7- Save the changes to enforce the DNS range, then return to the Initial Properties screen and change the DNS range for Internet Protocol Version
6 (TCP/IPv6) with the following Selected DNS server and Alternate DNS server values:
- 2001:4860:4860::8888
- 2001:4860:4860::8844
8- Save the changes by tapping the Apply button, restarting your computer, and seeing if the issue is now resolved by trying to activate your Windows license once again.
If the same problem is still happening, move down to the next potential fix below.
Procedure 4: Using MAK (Multiple Activation Key)
Once you’ve assured that the DNS server you’re currently connected to is not responsible for the apparition of the 0x8007267C error, one last thing you can attempt before requesting specialized support, you can switch to a MAK product key to activate your volume license installation.
Some affected users who were trafficking with the same problem have confirmed that using the SLMGR utility was the only thing that let them fix it.
If you have not tried avoiding this error via SLMGR yet, follow the instructions below to utilize the Software Licensing Management Tool to try to activate your Windows 10 license key:
1- Open up a Run dialog box by pressing Windows key + R. Next, write ‘cmd’ inside the text box and press Ctrl + Shift + Enter to start up a Run dialog box. When you’re prompted by the UAC (User Account Control), agree Yes to grant admin access.
2- Once you’re inside the elevated CMD prompt, type the following commands and press Enter after each one:
slmgr /ipk *License Key*
slmgr /ato
Note: Keep in thought that *License Key* is only a placeholder for the actual license key you are trying to activate. Therefore, replace the placeholder above with your Windows 10 license key.
3- Once both commands are processes successfully and you get the confirmation message, reboot your machine and wait for the next startup to complete before checking if the activation has been successful.
In case using MAK didn’t allow you to avoid the apparition of the 0x8007267C error code, move down to the next potential fix below.
Procedure 5: Contacting a Microsoft Support Agent
In case none of the procedures above have worked in your case and you’ve made sure that you’re using a viable Windows 10 licensed key, your last resort should be to get in contact with a LIVE Microsoft agent.
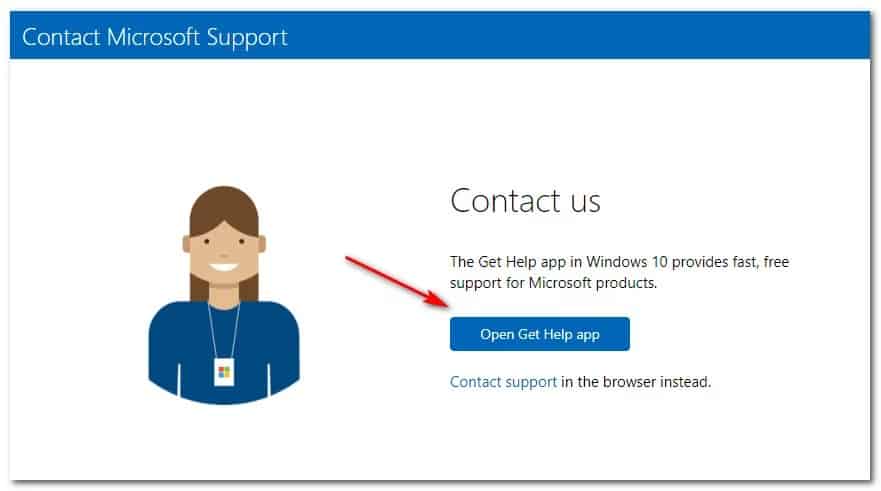
Keep in thought that there are multiple ways to get in contact with a Microsoft Live agent; however, the most common and quickest route is to rely on the official MS contact page and use the Get Help app’s chat option.
Once you have fortunately followed the instructions to contact a live agent, be prepared to answer a few routine questions to confirm that you are the license owner.
Also, Check :
Final Thought:
Here we Mentioned above To Solve Activation Error 0x8007267C. So, After everything checks out, the support agent will attempt to activate the key on your computer remotely.