
A static IP address server configuration may occasionally be necessary to acquire network connectivity when a DHCP server is not operational. The methods to configure a static IP address in Windows 7 are simple, although the procedure differs from those of Windows Vista and XP. Let us now walk through the procedures to configure static IPv4 address in Windows 7.

How To Configure Static IP Address In Windows 7?
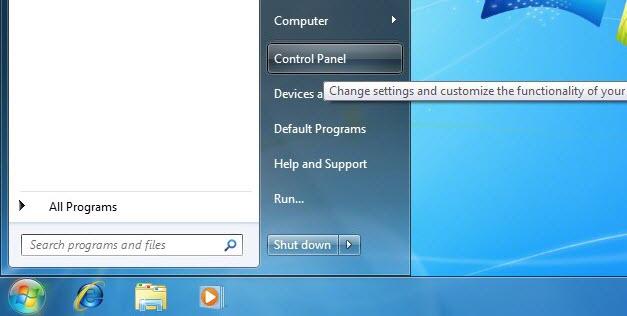
The first step is to acquire access to Network and Sharing Center in Windows 7. This may be done in one of two methods; the first is through the control panel. Select the Windows 7 Orb in the lower left corner and then select the control panel option, as shown below.
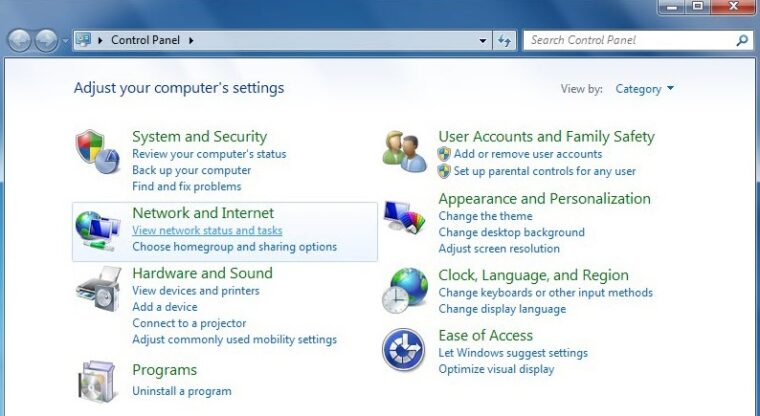
The control panel can be viewed in various ways; the category view is used by default. The option to select View network status and Tasks is noted below when using the category view. This will open the Network and Sharing Center.
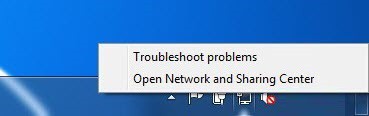
The network icon displayed in the system tray when a network interface is enabled is the second way to reach the Network and Sharing Center. When you right-click this icon, the option to open the Network and Sharing Center appears, as shown below.
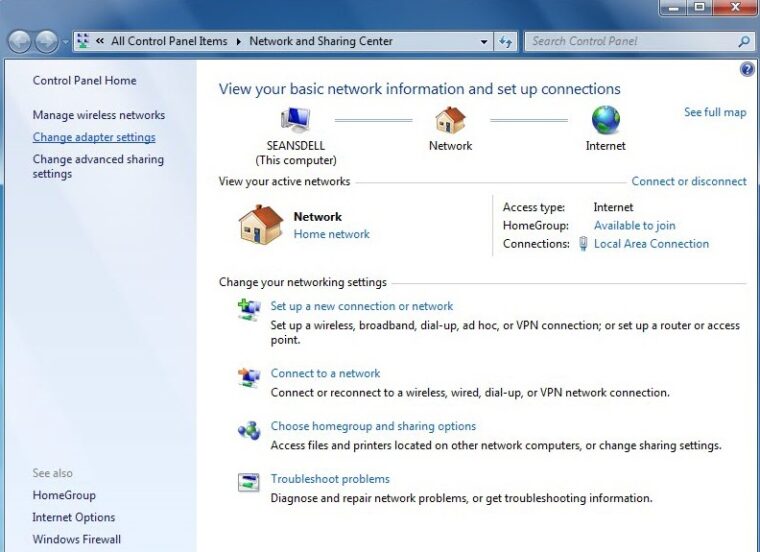
The option to change adapter settings is shown in the top left-hand corner of the window after the Network and Sharing Center is open. This is shown in the figure below (click the image to enlarge).
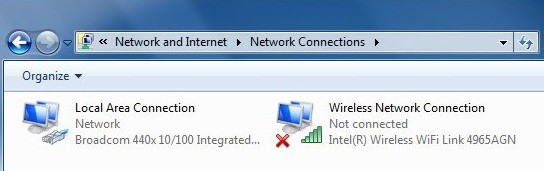
An interface configured using the static IP address window must first be selected in the Network Connections window. Well, a wired and wireless interface are shown as examples in the following example. This article will use the wired interface as the interface that will be assigned a static IP address.
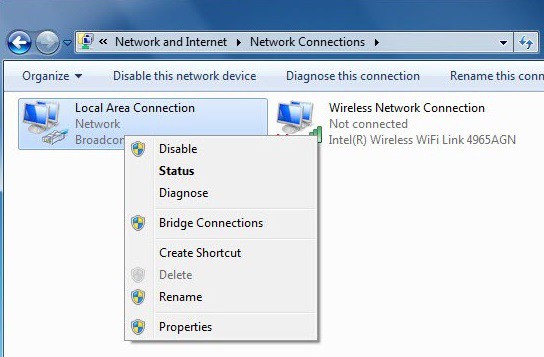
A sub-menu is shown when you right-click on the appropriate interface; from this menu, you may select the Properties option.
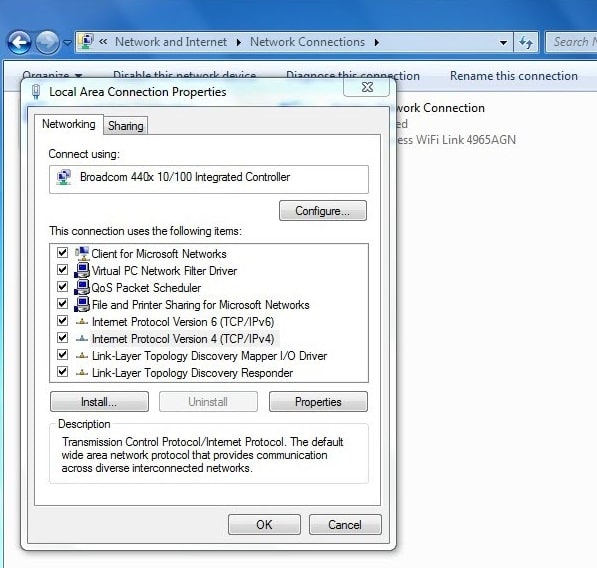
The interface properties windows will be displayed if the properties option is selected. This page provides the option to customize a variety of network options. This option must be selected from the window since we wish to change the IPv4 address of the interface. The properties button will be enabled if this option is selected; tap it.
When the properties button is hit, the IPv4 properties window is displayed, revealing that the interface is configured to get its IP address and DNS server information automatically.
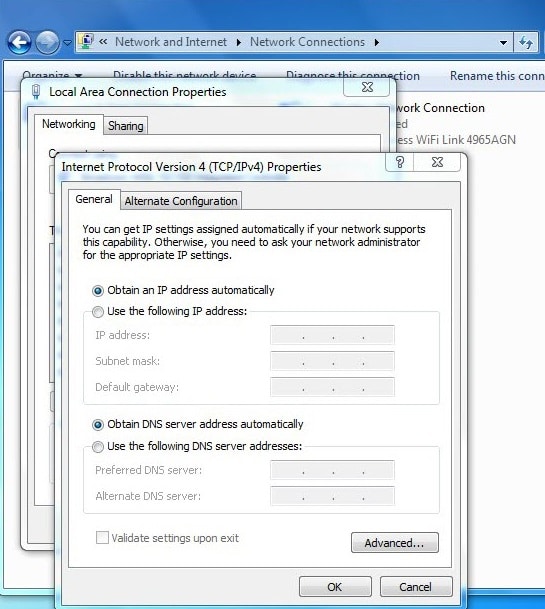
The option to input IP address parameters must be selected to change to a static IP address, and the Use the following DNS server addresses option must also be selected. The IP address 192.168.1.100 is used in this article, with a subnet mask of 255.255.255.0 and a default gateway of 192.168.1.1. 4.2.2.2 will be the DNS server that will be configured. In the figure below, these options are shown in their proper order.
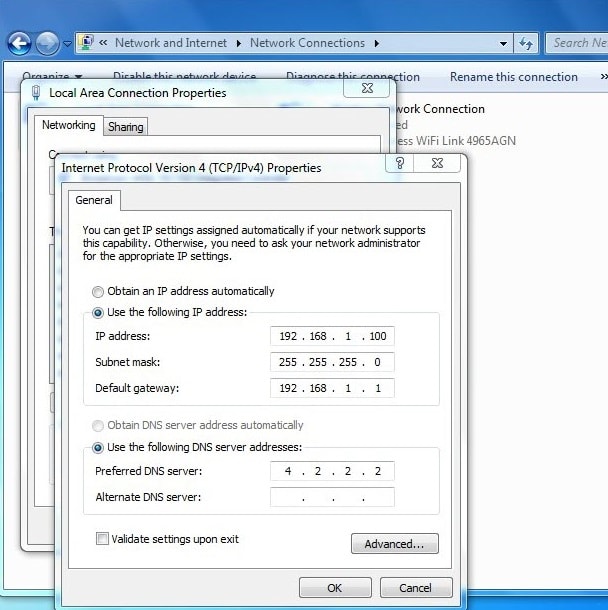
Once these options have been entered on the page, just hit OK on both property panels to finish the static IP configuration.
Conclusion:
Information on static IP configuration is essential in current organizational contexts because many do not employ automated IP assignment entirely; it is also essential information while attempting to troubleshoot IPv4.


