
In 2015, Windows 10 added the fingerprint sensor. However, following the Windows 11 update, several customers claimed their fingerprint sensor was not working. Although you may restart your computer using the “Restore from a previous time” option, this does not always work. In addition, other programs, such as antivirus software, might occasionally cause the problem. The worst aspect of Windows 11 is its touch sensitivity. If there is even a trace of dust on the sensor, the program will not start. The problem is that the sensor detects repetitive touch patterns in addition to your touch. In addition, many customers reported that the updated Windows version has issues and missing functionality. Previous blogs have highlighted Windows 11 difficulties, such as the scanner not working and the lack of a clock and date, File Explorer latency, and the scanner’s inability to identify fingerprints. In addition, users reported that their fingerprint readers had mysteriously stopped working. Well, the option to add or remove a fingerprint is no longer accessible, according to users.
Fingerprint Sensor Not Working In Windows 11? How To Fix
The best ways to fix Windows’s Fingerprint Sensor Not Working problem are compiled here. You can attempt each method one at a time. In addition, we give photographs of each stage to make it easier to follow along.
Add New Fingerprint
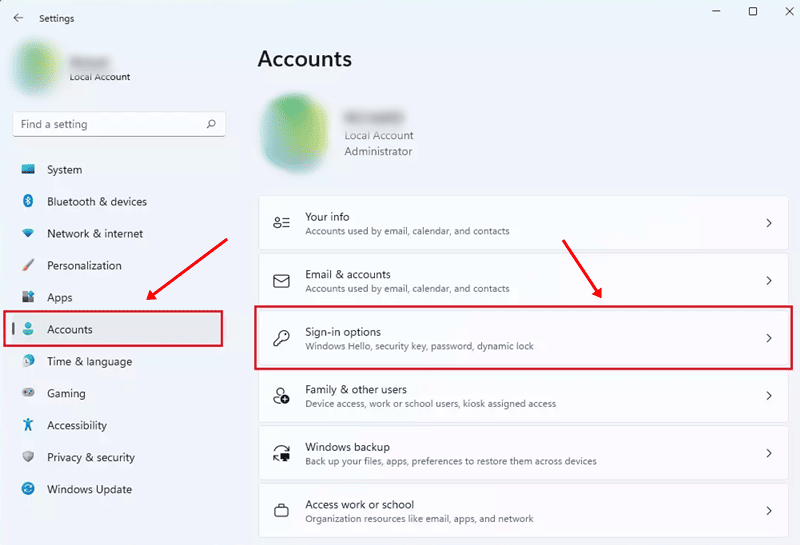
- To begin, click Settings in Windows 11’s Start menu. Alternatively, hit the Windows + I button.

- Now, on the left, click Accounts.
- Click the Sign-in options link in the Accounts menu’s right pane.
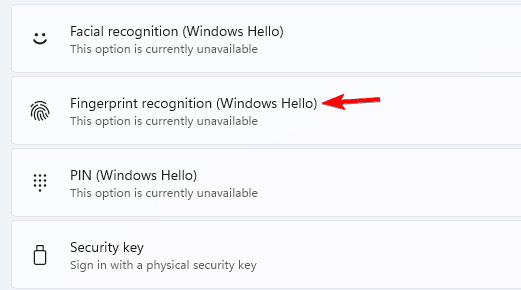
- Then, expand the Fingerprint Recognition options, where you may remove or add additional fingerprints. Finally, add a finger by clicking the Add a finger button.
- Follow the instructions on your screen and log in using your newly added fingerprints.
Uninstall & Reinstall Drivers
- Type devmgmt.msc and press Enter to open a Run dialog box by pressing Windows + R button.

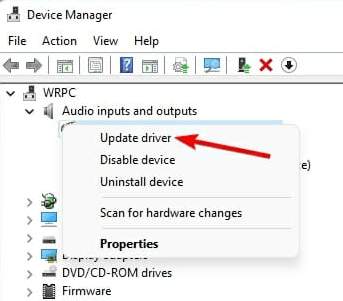
- Your device manager should now be open. Find Biometric devices and expand your options.
- Now, from the list of Biometric devices below, right-click on that device and choose Uninstall device.
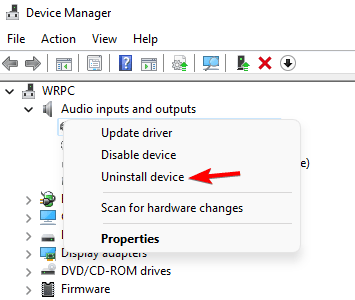
- Restart your computer after selecting the Uninstall button in the confirmation box.
- Windows 11 will automatically identify and install new drivers upon restart.
Note: If your Windows does not automatically install drivers, we recommend using updater tools to identify your hardware and install appropriate drivers for your computer.
Update Biometric Drivers
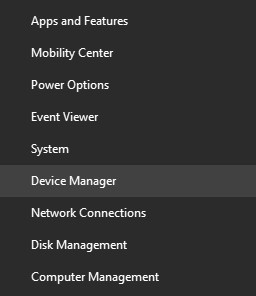
- To open the start menu options, press Windows + X and pick Device Manager.
- Locate Biometric devices, expand that option, and right-click on the device to choose Update driver.
- On the next screen, click the option Search automatically for drivers.
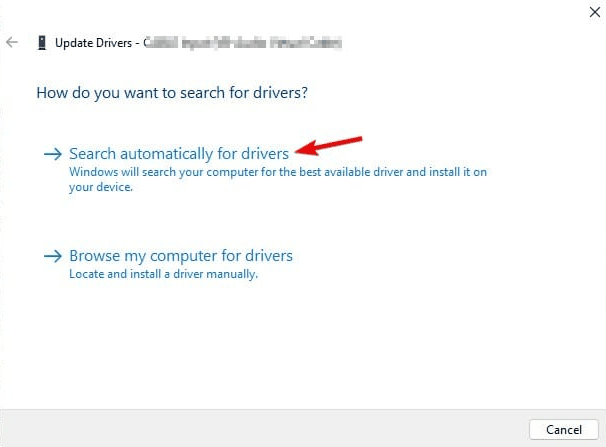
- Then, to update your Biometric Drivers, follow the on-screen instructions.
Check For Windows Updates
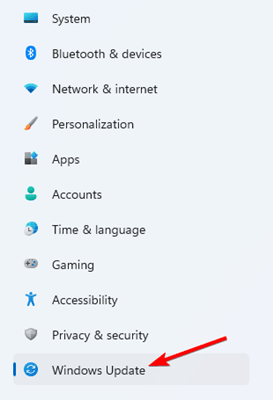
- Select settings from the start menu.
- In the last option on the left menu, click Windows Update.
- The Windows updates available for your PC are now visible to you. You can check for updates by clicking Check for updates.
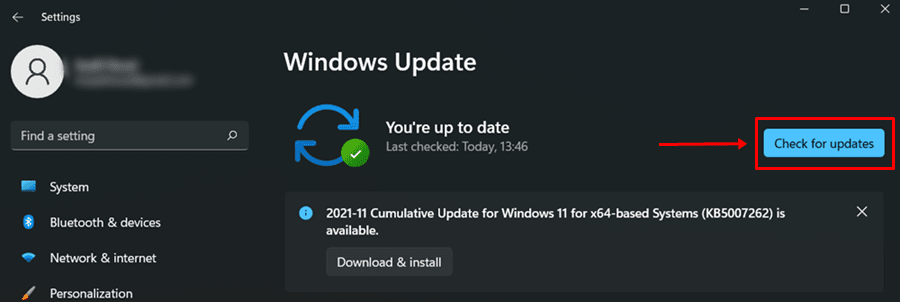
- This option will be retrieved and displayed if the latest update is available for your Windows 11 PC.
The Bottom Line:
The solutions listed above are the most frequent and technical methods for fixing Fingerprint Sensor Not Working in Windows 11. Starting with the most basic way, you may start fixing fingerprint problems. If it solves your problem, great; otherwise, you can try more complicated fixes. Please comment if you have further fixes to solve this problem or questions regarding this post.


