
Well, Using an external hard drive to store your data is one of the most cost-effective options. Many users store a data backup on both external and internal hard drives. If you use an external hard drive to store your data, you have nothing to worry about, but the problem arises when your Windows 11 PC does not recognize it. If your PC does not detect your external hard drive, it is most likely due to either hardware (such as a defective hard drive) or software difficulties (such as an outdated driver, an unassigned drive letter, and so on). This post will walk you through the troubleshooting steps for Windows 11 not showing up on an external hard drive.
How To Fix Quickly External Hard Drive Not Showing Up In Windows 11?
If you have a hard drive, you can expect to see this message on your computer screen. You may repair Windows 11 won’t detect an external hard drive by following the steps outlined below.
Ensure Hard Drive Is Properly Connected To PC
The first thing you should do is double-check that your external hard drive is perfectly attached to your computer. If there is a problem with the cable, you should check it. Check that the connection is not slack and that the cable is not worn off since this might be the source of the problem.
Update Hard Drive Driver
The most typical cause of this issue is out-of-date drivers. You should check out the Hard Drive’s website to see if there are any updates available. Follow the instructions below to update the hard drive driver.
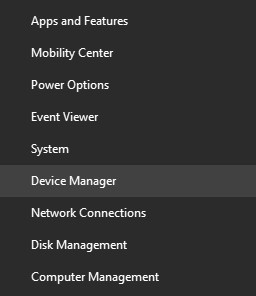
- Click Device Manager from the menu by pressing the Windows + X key combination.
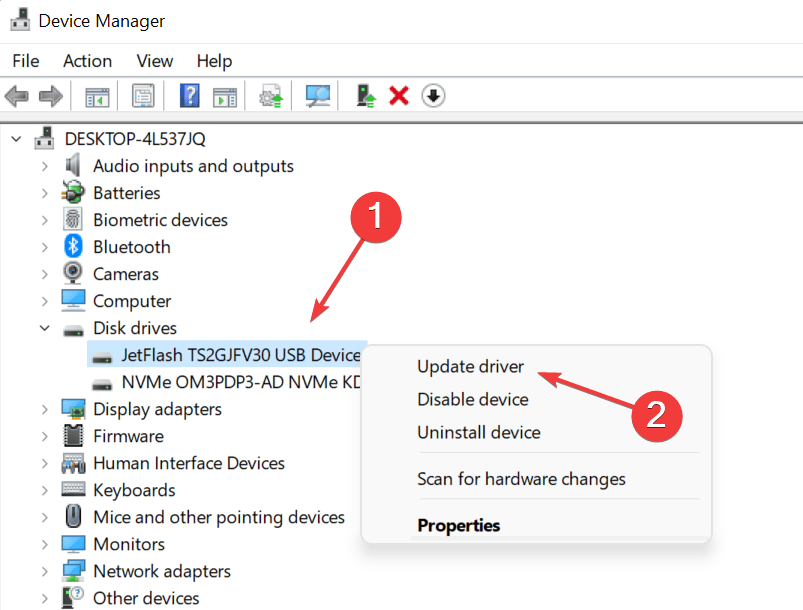
- Double-click to expand the Disk Drives section.
- Pick your external hard drive from the list, then click Update Driver.
- Then, to update the driver, click Search automatically for drivers.
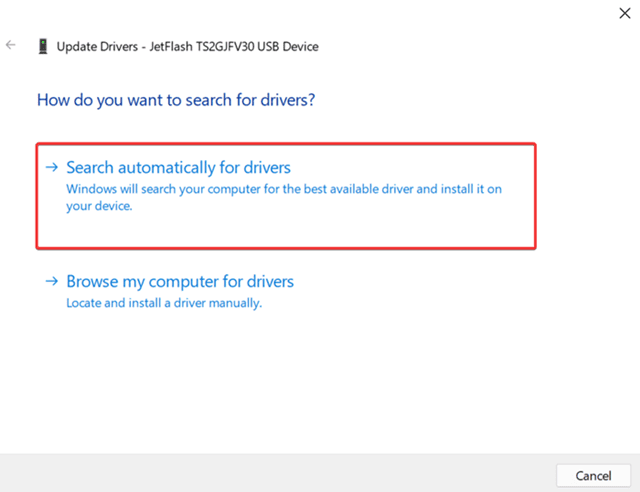
- Once the driver is updated, restart the PC and the issue should be fixed.
Initialize External Hard Drive
This only applies to fresh hard drives. If you recently purchased an external hard drive and it’s not recognized by Windows 11, you must first initialize it. The instructions to initialize the external hard drive are listed below.
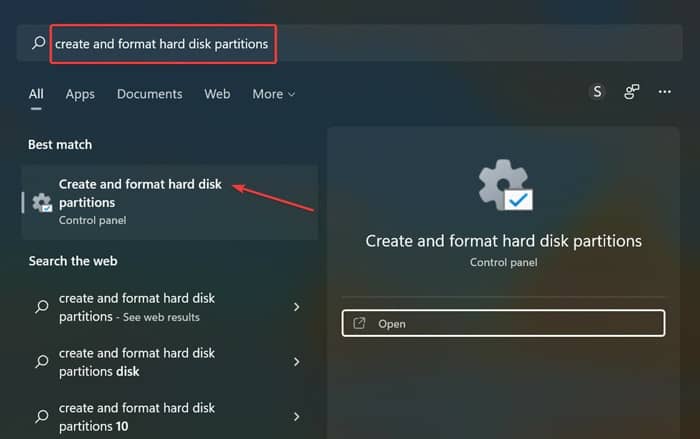
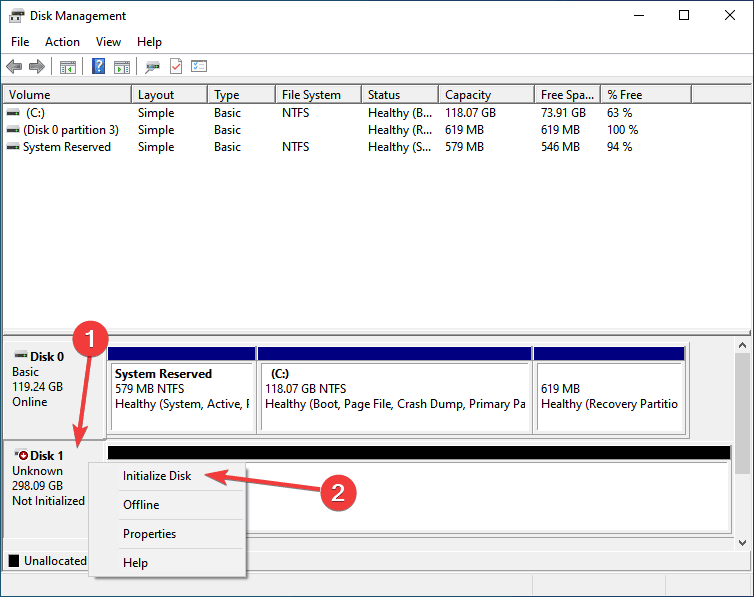
- Search for and open Create and format hard disk partitions in the Start Menu.
- Now, seek for the problematic hard drive. If the hard drive is shown as Not Initialized, right-click it and choose Initialize Disk.
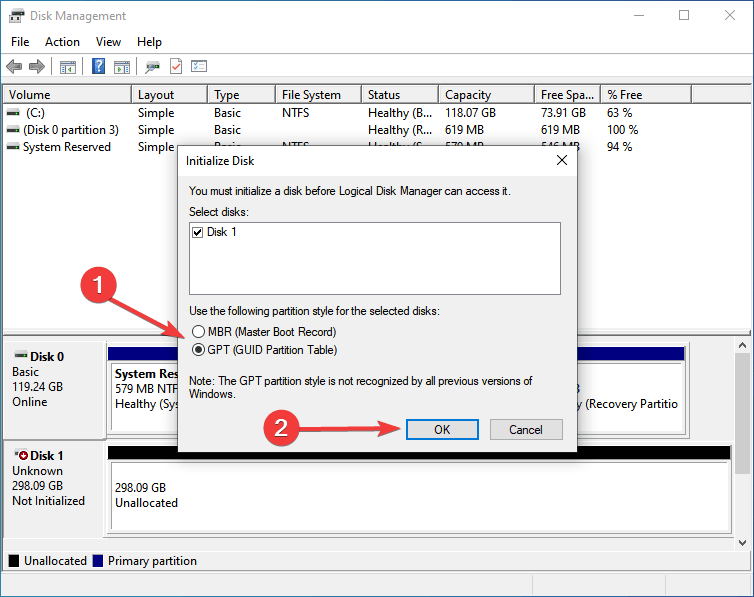
- Set the Partition Style to GPT (GUID Partition Table) and click OK on the next window.
- Now, right-click the empty external hard drive and select New Simple Volume.
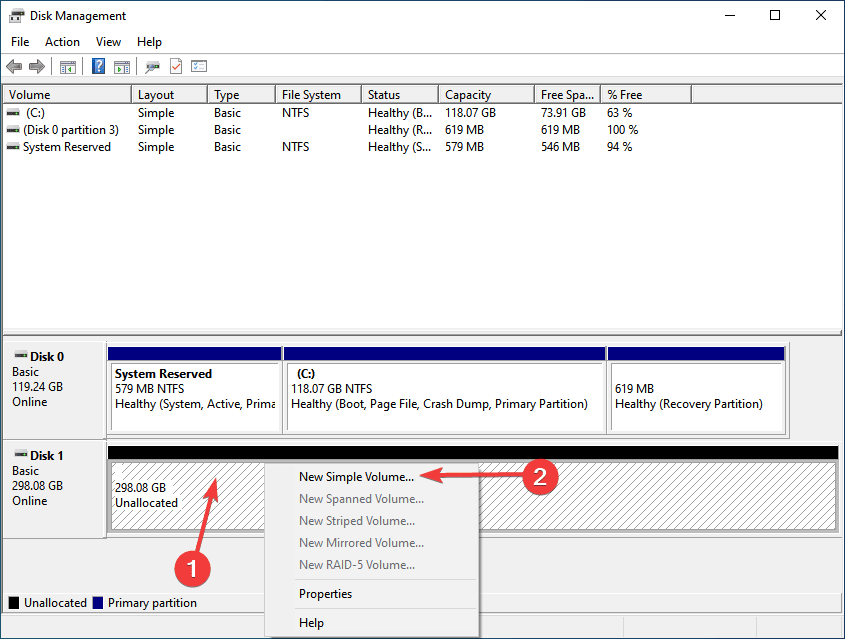
- Click Next to proceed with the creation of a new simple volume.
- The Simple Volume Size in MB is what you should be concerned with, so go ahead and enter it. After entering the maximum size, click Next.
- Now, assign the external hard drive a drive letter and click Next.
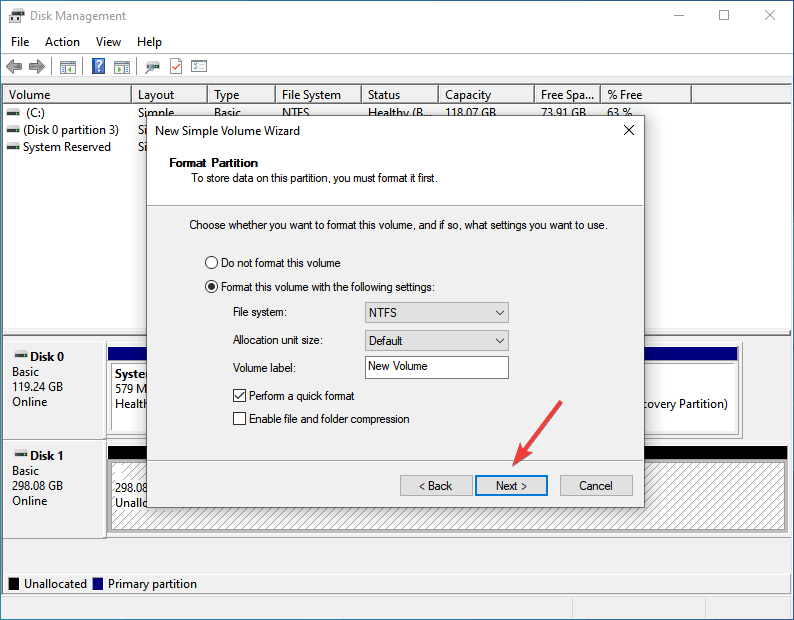
- Select Format this volume with the following settings option, then make the below changes.
- File System- NTFS
- Allocation Unit Size- Default
- Volume Label- Set it to anything you want.
- If you wish to format the drive rapidly, check the Perform a quick format checkbox. Continue by clicking Next.
- After that, click Finish to finish building the new basic volume.
Assign Drive Letter
Additionally, you may face the issue if the drive letter is not allocated to the External Hard Drive. You should assign the drive letter to the disk and check if the issue persists. By following the steps outlined below, you may assign a drive letter.
- Click Disk Management after right-clicking on the Start Icon.
- In the Disk Management window, right-click on the hard drive and pick Change Drive Letter and Paths.
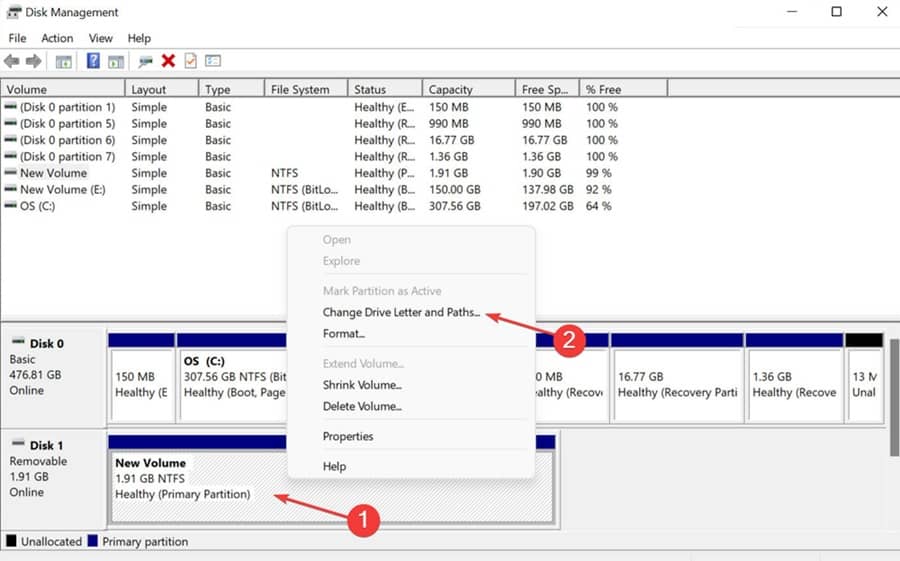
- On the following window, click Add button.
- Pick the Assign the following drive letter option. Then, use the drop-down option to select a letter from the list.
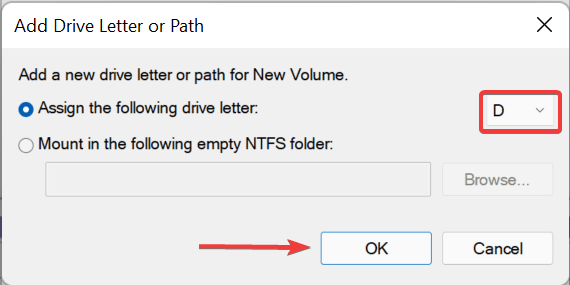
- To save the changes, click OK and dismiss the Disk Management window.
Final Thoughts:
This guide can assist you if Windows 11 does not identify the external hard drive. We’ve gone through several troubleshooting steps that will help you solve the external hard drive that is not showing up by Windows 11.


